Getting Started with the OSVVM
In this post we compile the OSVVM libraries and run one of the built-in tests. We then discuss the architecture of an OSVVM testbench.

Although functional simulation can significantly improve the quality of our designs, creating a verification environment from scratch can be time-consuming. Luckily, there are open-source libraries that allow us to set up advanced testbenches with relatively low upfront effort.
In previous posts, we discussed the UVVM, one of the two widely used open-source VHDL verification libraries. The OSVVM is the other major one.
In this post, we will compile the OSVVM libraries and run one of the built-in tests. We will then discuss the architecture of an OSVVM testbench.
What is the OSVVM?
The Open-Source VHDL Verification Methodology (OSVVM) is a set of VHDL libraries that provide the infrastructure for building advanced verification environments. The OSVVM includes utilities for randomization and coverage, verification components, reporting and test management, and support for several popular simulators.
Compiling the OSVVM Libraries
We start by downloading the latest version of the OSVVM libraries:
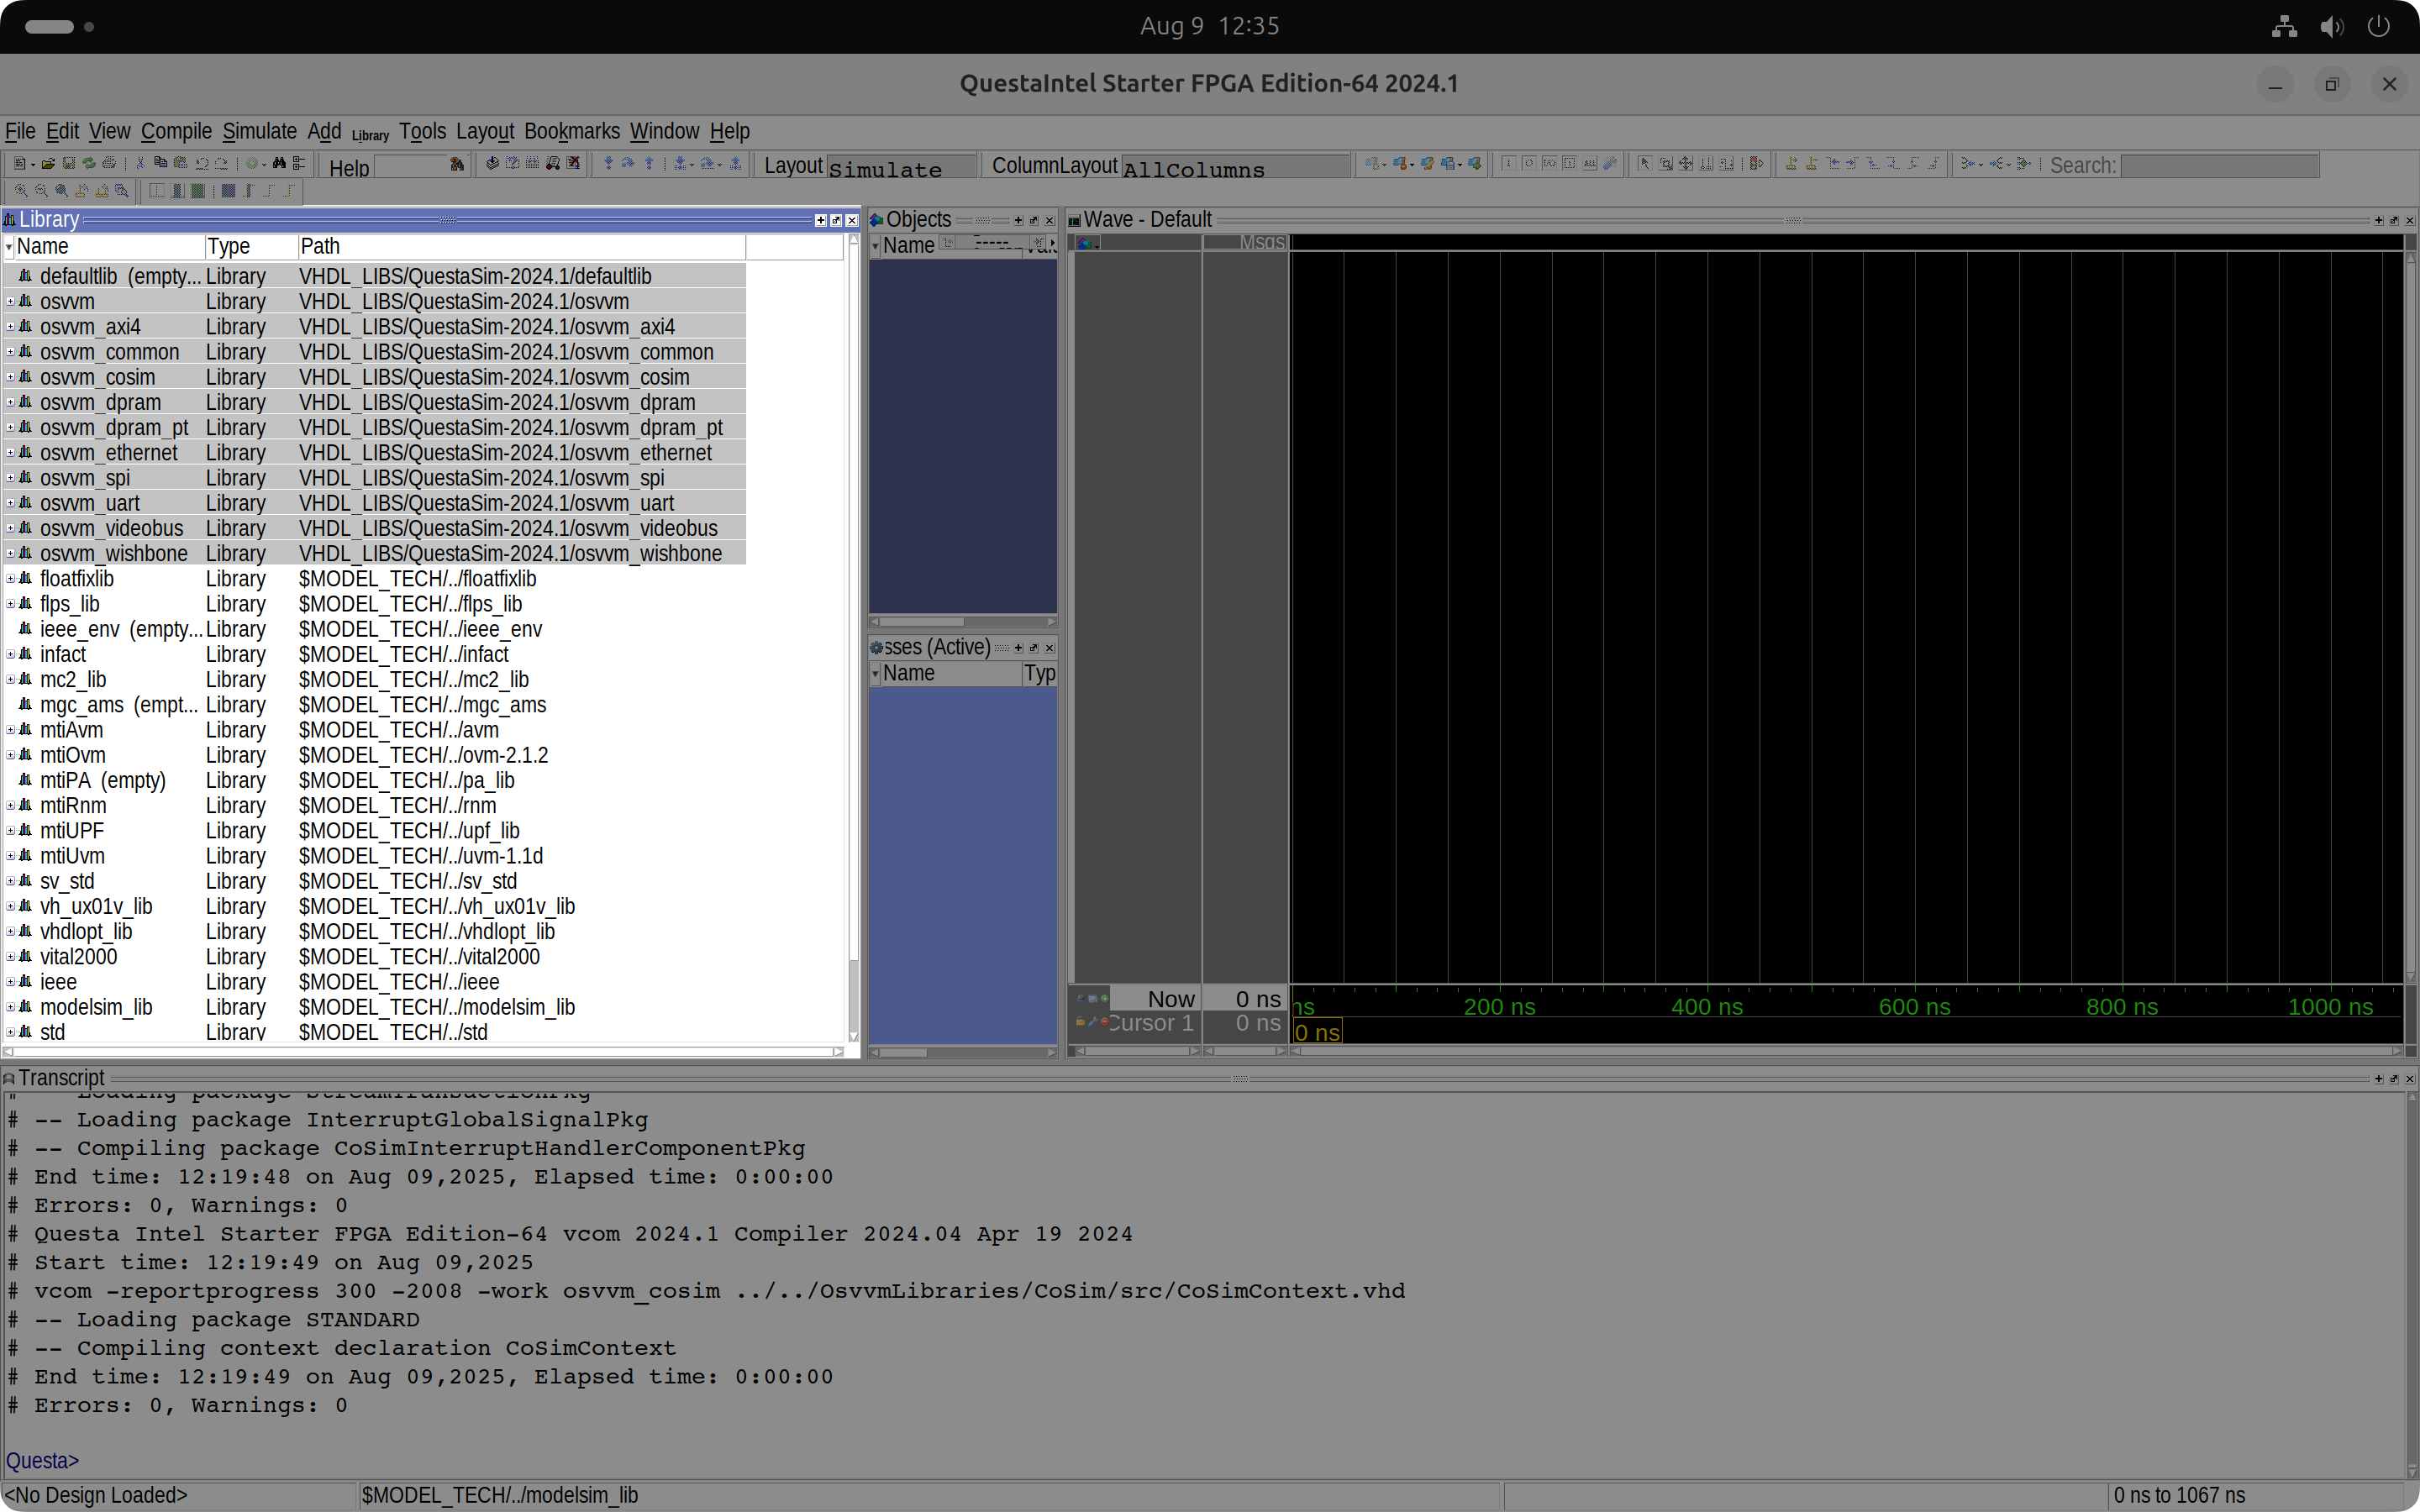
git clone --recursive https://github.com/osvvm/OsvvmLibrariesWe then navigate to the working directory of our simulation project, which should be different than the folder where the OSVVM sources are stored. From there, we start Questa:
vsim .We will now compile the OSVVM libraries using the built-in Tcl scripts. From Questa's Tcl console, we run the OSVVM 'StartUp.tcl' initialization script and compile the simulation libraries with OSVVM's 'build' command:
source ../../OsvvmLibraries/Scripts/StartUp.tcl
build ../../OsvvmLibraries
The OSVVM script compiles the libraries and creates a local 'modelsim.ini' file with the library mappings, ready for use in our simulation.
Running a built-in OSVVM Test
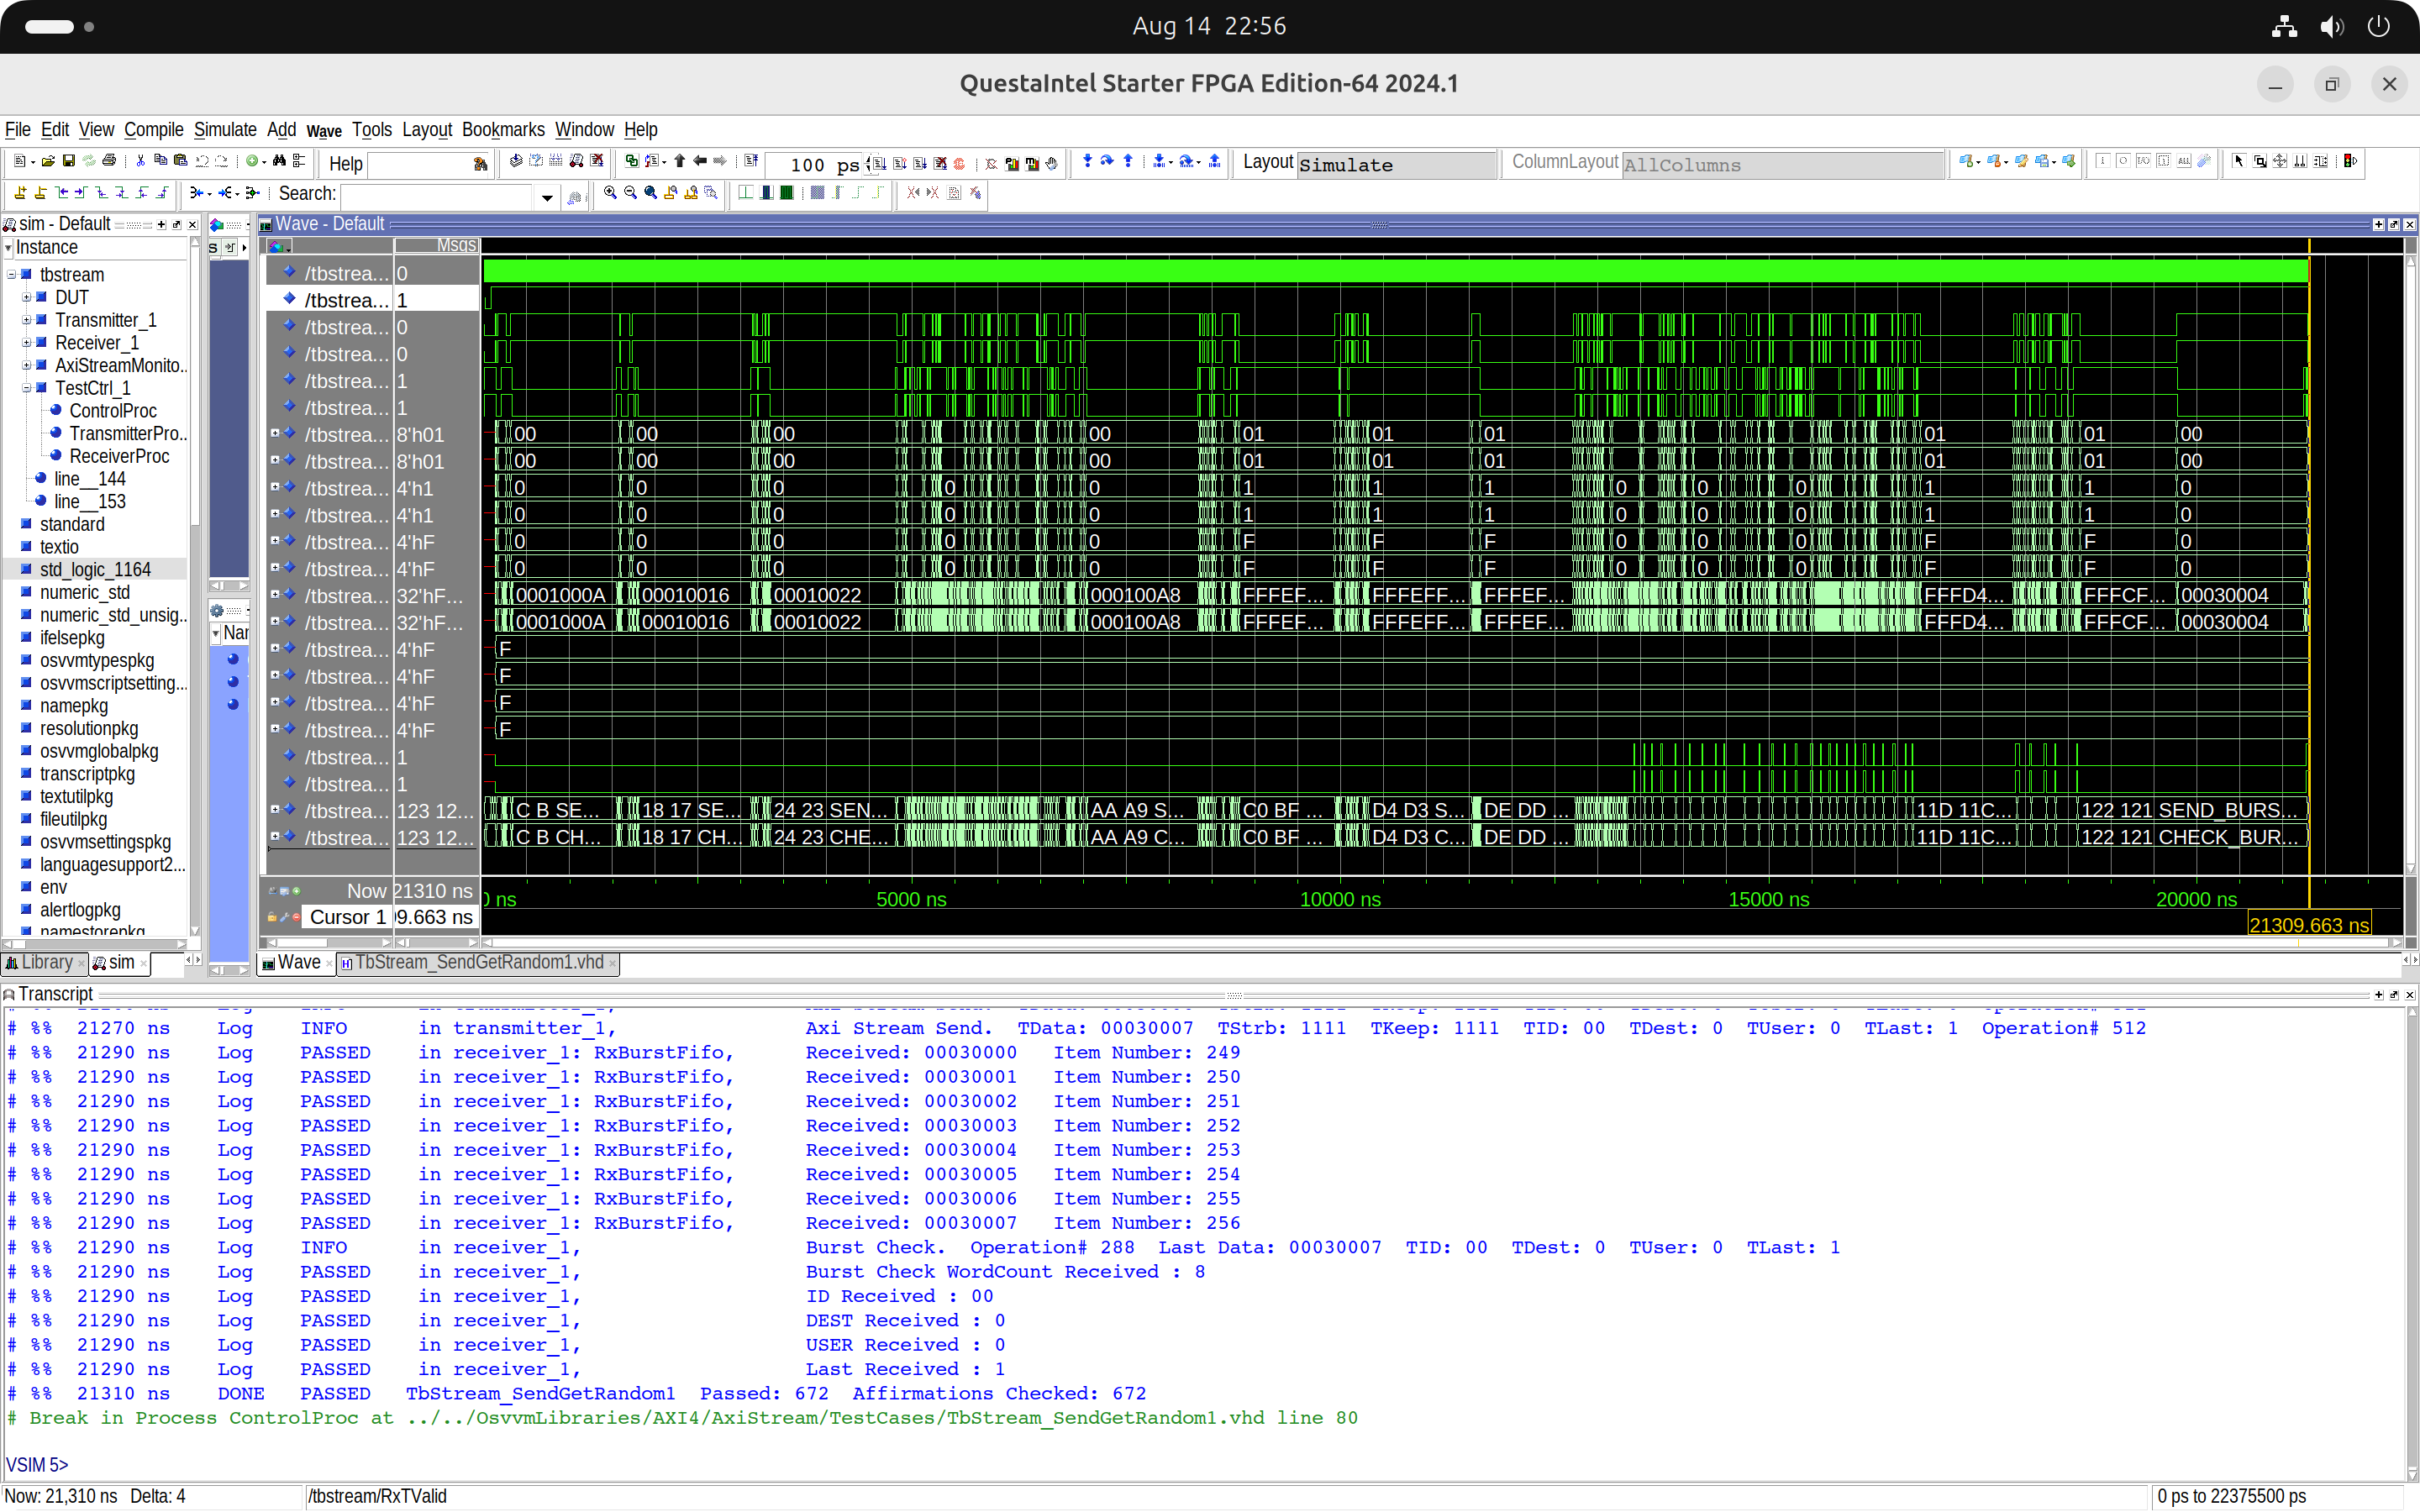
We will now run a test using the OSVVM scripts. The 'RunTest.pro' script in the 'OsvvmLibraries/AXI4/AxiStream' folder contains all the built-in AXI-Stream tests. We will uncomment the first one to run it, leaving all the others commented.
# Make TestCases the frame of reference
set ::osvvm::CurrentWorkingDirectory [file join $::osvvm::CurrentWorkingDirectory TestCases]
RunTest  TbStream_SendGetRandom1.vhd
# RunTest  TbStream_SendGetRandom2.vhd
# RunTest  TbStream_AxiSendGetRandomParam2.vhd
# RunTest  TbStream_AxiSendGetRandomParamAsync2.vhd
# RunTest  TbStream_AxiSetOptions1.vhd
# RunTest  TbStream_AxiSetOptions2.vhd
# RunTest  TbStream_AxiSetOptionsAsync1.vhd
# RunTest  TbStream_AxiSetOptionsAsync2.vhd
# RunTest  TbStream_AxiBurstNoLast1.vhd
# RunTest  TbStream_AxiBurstAsyncNoLast1.vhd
# RunTest  TbStream_AxiSendGet2.vhd
# RunTest  TbStream_AxiSendGetAsync2.vhd
OsvvmLibraries/AXI4/AxiStream/RunTest.pro
We can now run the 'RunTest.pro' script.
build ../../OsvvmLibraries/AXI4/AxiStream/RunTest.proWe can see in Questa's Transcript window that the simulation passed without errors. After adding the test bench signals to the wave window and restarting the simulation, we can also view the waveforms.
OSVVM Testbench Architecture
An OSVVM testbench is made up of three elements:
- A design under test (DUT)
- A testbench
- A testcase
The testbench is described in a single file, while the testcase is split into two files: an entity declaration and an architecture definition. This structure is shown in the image below.
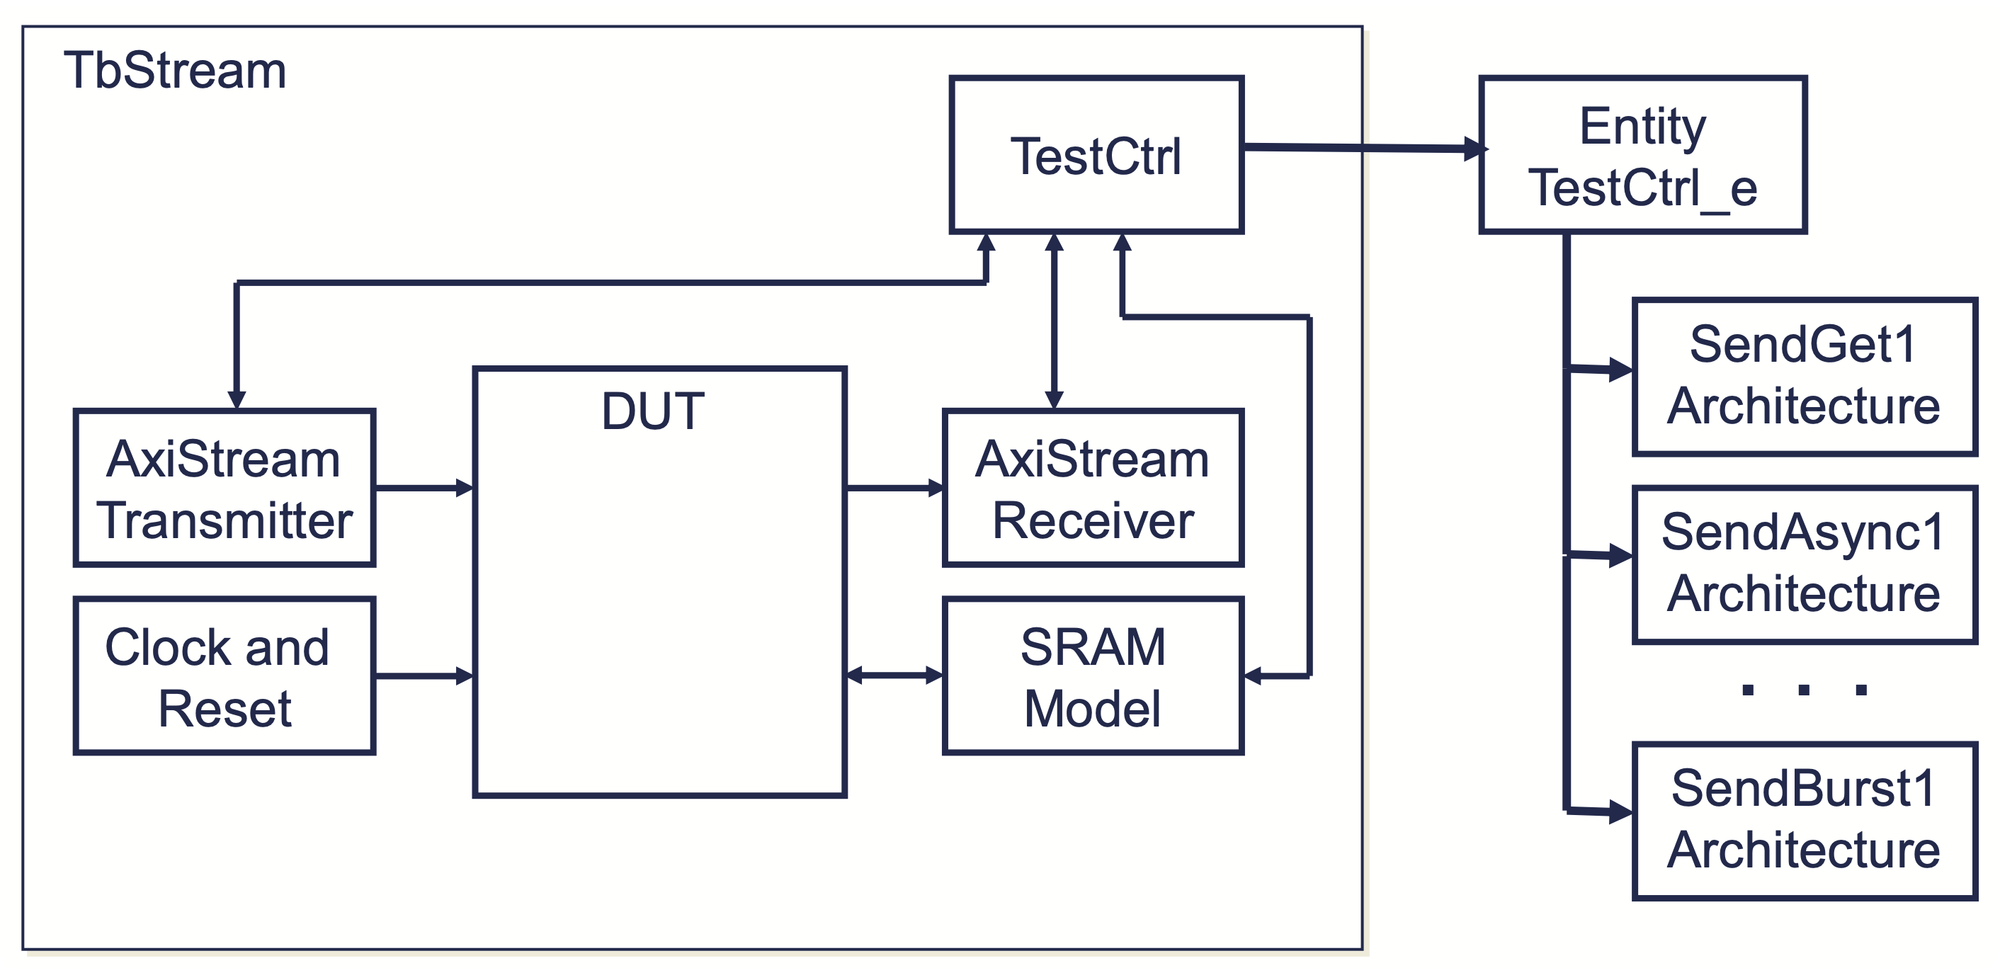
For our test, we selected the 'SendGetRandom1' AXI-Stream testcase included in the OSVVM code.
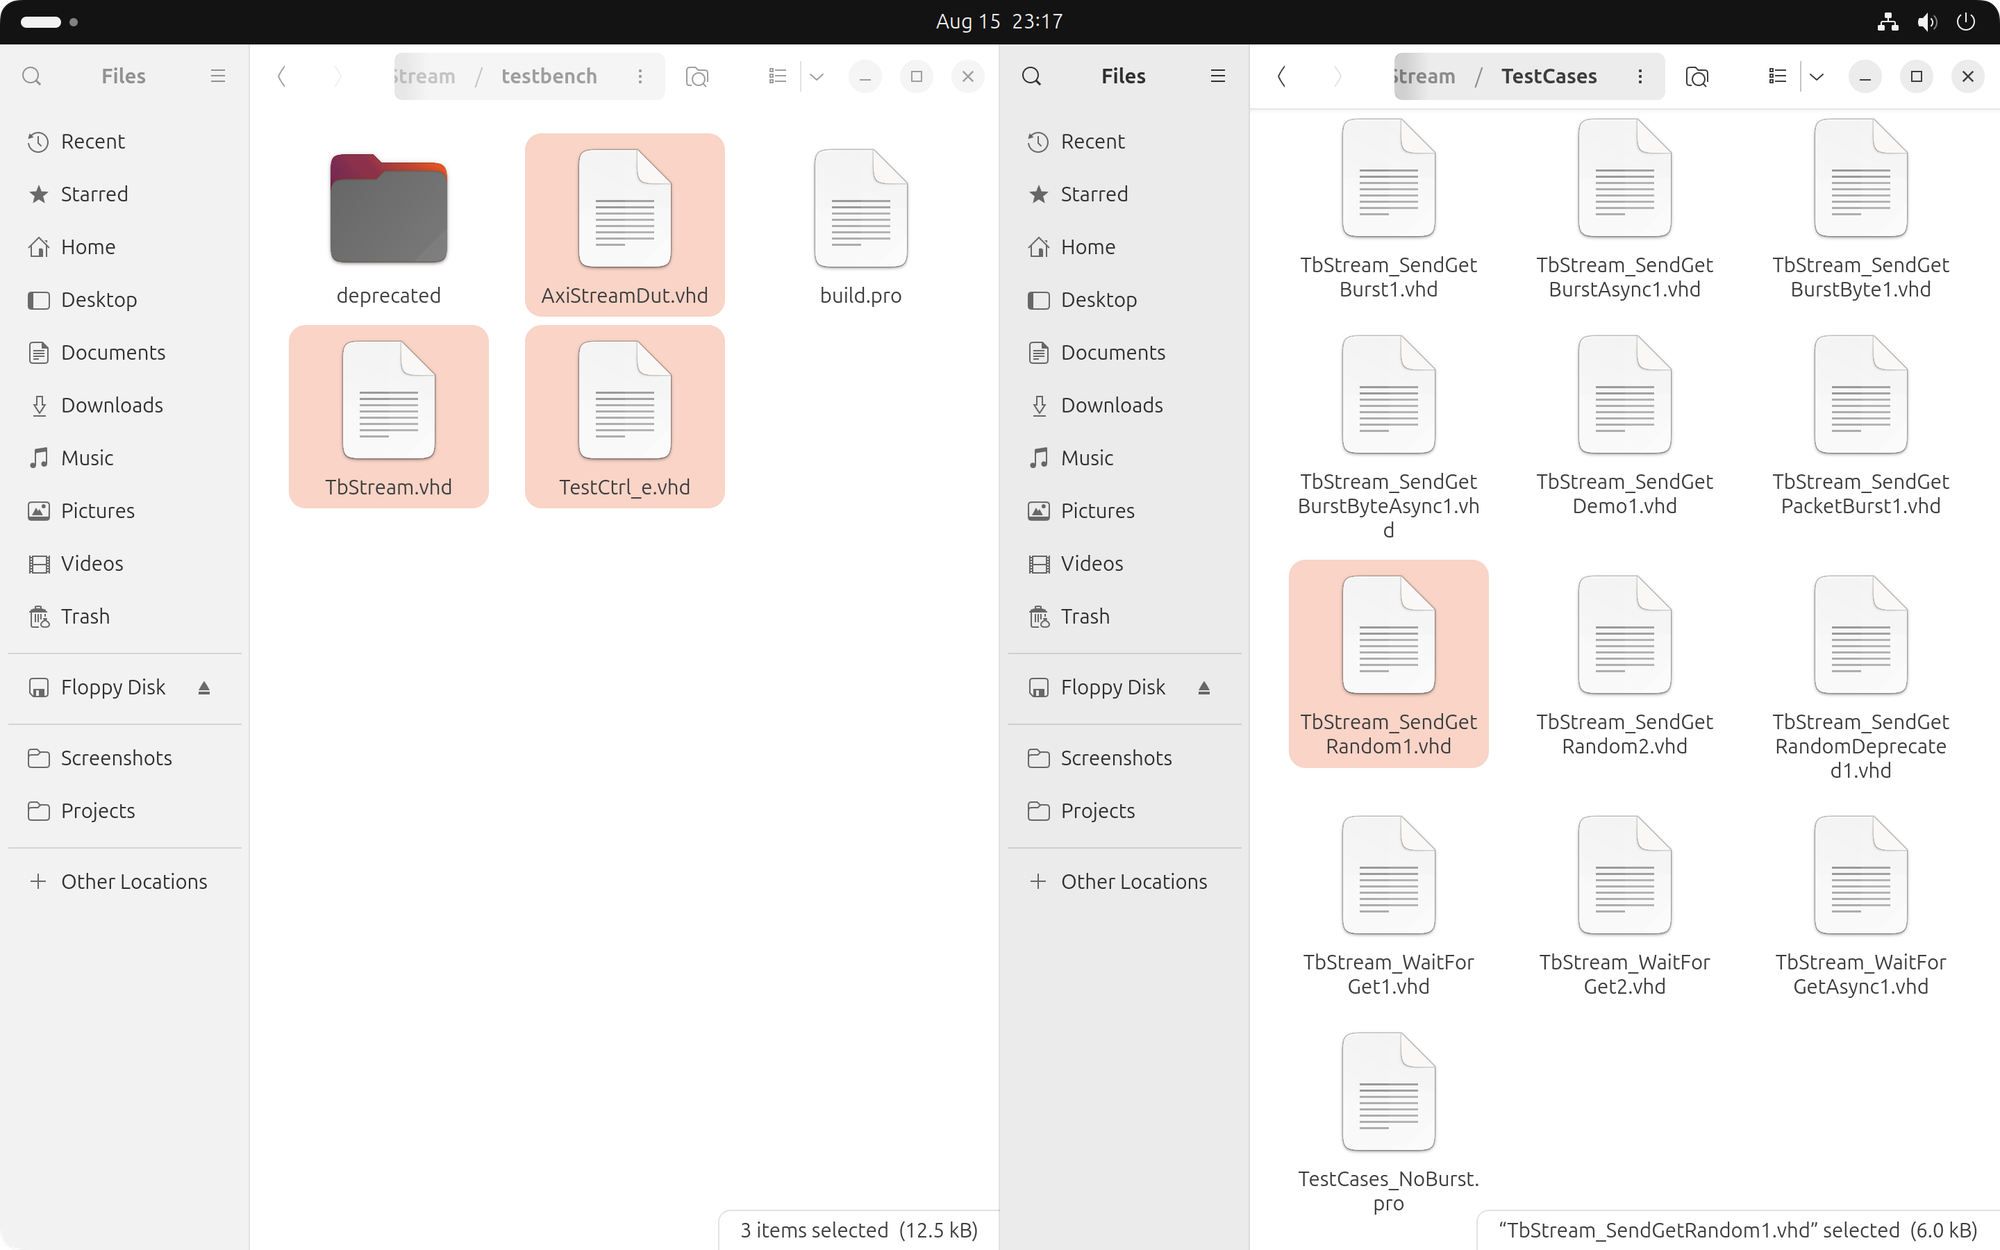
- The DUT is described in the 'AxiStreamDut.vhd' file in the 'OsvvmLibraries/AXI4/AxiStream/testbench' folder.
- The testbench is described in the 'TbStream.vhd' file in the 'OsvvmLibraries/AXI4/AxiStream/testbench' folder.
- The testcase entity is declared in the 'TestCtrl_e.vhd' file in the 'OsvvmLibraries/AXI4/AxiStream/testbench' folder.
- The testcase architecture is described in the 'TbStream_SendGetRandom1.vhd' file in the 'OsvvmLibraries/AXI4/AxiStream/testCases' folder.
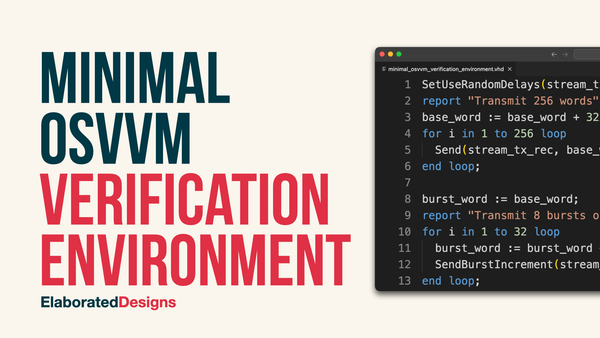
In the next post, we will replace the standard OSVVM architecture with a minimal, single-file AXI-Stream testbench, which we will run using a custom simulation script.
Cheers,
Isaac